Thursday, December 31, 2009

Your 2010 Computer Calendar


It's New Year's Eve so I'm thinking about a new calendar of events for 2010. When I plan my home visits and computer classes, I use my computer to keep track of start and end dates and then my computer sends this information to my BlackBerry (smartphone) so that I always have an up to date calendar with me when I'm on the road.

If you're thinking of using your computer to manage your calendar, here are three top choices that I would show you how to use:

On the Internet:

Use Google Calendar for an internet based calendar. This is great for people who share a calendar with an organization (or even for a family reunion). The calendar is created, edited and stored on the internet so you can access from anywhere at anytime.

Managing a Google Calendar

Steps for Adding an Event

  1. Login to the Google Calendar using the login and password for that calendar.
  2. Select Create Event from the top left menu.
  3. In the What field, type a description of the event.
  4. Specify When it will occur, including any Repeats.
  5. In the Where field, type the location of the event.
  6. Next to Calendar, you should see the name of your calendar.
  7. In the Description field, type any event information such as cost and any other information about the event.
  8. Select Available next to Show me as.
  9. Keep Privacy set to This event is: Default.
  10. Click Save.
Steps for Editing an Event
  1. Log in to the Google Calendar using the login and password
  2. From the calendar, click on the event you want to modify.
  3. Change any of the input fields.
  4. Click Save.
On a Windows PC:
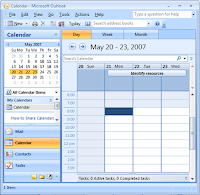
Use Microsoft Outlook for a Windows based calendar. This is great for people who use email and a BlackBerry, Palm or other type of smartphone or PDA (personal digital assistant). The calendar is created, edited and stored on your computer so if you use a laptop, notebook or netbook you can access from anywhere at anytime.

Creating an Appointment

Go to the view and navigate to the day that you want the appointment using the Date Navigator.

  1. Highlight the time of the appointment by holding down the mouse and dragging to include the start and end time.
  2. After the correct time is selected, release the mouse and type a name for your activity. That name will be displayed on your calendar view.
  3. Hit Enter twice.
  4. Use the form that pops up to finish creating the desired appointment, including entering in a location, description, etc.
On a MAC:
Use iCal for a MAC based calendar. This is great for people who manage multiple calendars (work, home, kids, charity, etc.) or use email and a BlackBerry, Palm or other type of smartphone or PDA (personal digital assistant). The calendar is created, edited and stored on your computer but can be synced with Google Calendar and therefore be made available on the internet so you can access it from anywhere at anytime.

Create an iCal Event from Apple Mail

Leopard is smart—smart enough to recognize dates within the text of an email in Apple Mail.

When your cursor hovers over a date in the body of an email, a dotted rectangle surrounds the date, and a small arrow appears. Hold on the arrow, and up pop two iCal options: Create New iCal Event and Show This Date in iCal.

Screenshot

Choosing Create New iCal Event generates a dialog box. Its default name is the subject line of the original email, though you can change it here. You can also specify the location and duration of the event and add additional notes. When you’re finished, choose Add to iCal. Leopard adds the date to your calendar—without even opening iCal.

Screenshot

For more information on how to use your computer to manage calendar dates, check out the schedule of classes at www.thepcteacher.com or call Betsy for a personal training session at 201-327-0830.

Joyful Learning in the New Year!

Regards,
Betsy

The PC Teacher
bcoyne@thepcteacher.com
Sunday, December 20, 2009

Playlists on YouTube

Use your computer as a "virtual" stereo and play your favorite songs directly from You Tube. Many videos posted on YouTube are accompanied with songs either offered by the artist or by fans. Follow the steps below to search for your favorite songs and add them to a playlist which plays all the songs automatically:


1. Use your web browser (i.e. Internet Explore, FireFox, Safari, etc.) log on to www.youtube.com
2. To create a YouTube playlist, you must sign in or create a free YouTube account. You will be asked to create a unique username.
3. In the upper right hand corner of the YouTube home page, click on the link "Sign In" or create an account.
4. Once your are signed in you will see your YouTube username displayed in the upper right corner.
5. To find songs to add to your playlist, type a keyword in the search box at the top.
6. When you find a video that includes a song you would like to save to your playlist, click on the playlist link underneath the video.
7. Click to add a new playlist and give the playlist a name.
8. Repeat steps 5-7 until you have found all the songs for this playlist.
9. To play the songs from the playlist, click your username in the upper right corner of the screen and select playlists from the menu.
10. Click Play All to hear all the songs. When one song is over, the next will begin automatically. Turn the volume up on your computer and enjoy!
11. If you need to work on other parts of your computer while the music is playing, simply "minimize" the YouTube window and open another application.


Betsy
The PC Teacher
bcoyne@thepcteacher.com
Thursday, December 17, 2009

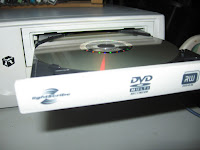
Lightscribe Technology


What is Lightscribe Technology?


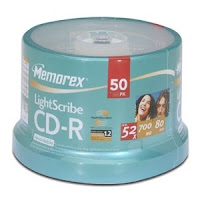
LightScribe Overview LightScribe is a disc-labeling technology that lets you laser-etch a label directly on your disc. Creating professional-looking discs is easy: burn your disc, flip the disc over, and then burn your label onto the disc. The same drive that burns your data, burns your label. A LightScribe-enabled DVD drive uses a laser to burn an image into the coating on the label side of a LightScribe disc. The LightScribe labeling system has no ink to smear, no paper to curl, and no sticky adhesive to cause problems.
To create a LightScribe label, you need: 1. A LightScribe-enabled DVD drive in your computer or LightScribe-enabled DVD writer. LightScribe-enabled computers or writers typically have the LightScribe logo or the word "LightScribe" displayed on the drive tray or computer itself.
2. LightScribe-supported disc-labeling software. This is often included with your LightScribe-enabled computer or DVD writer. 3. Specially coated LightScribe CDs or DVDs (sold separately at major retail stores or online). LightScribe discs are identified by the LightScribe logo on the media package. Refer to http://www.lightscribe.com/ for more details on LightScribe.

Creating a LightScribe Label Burning a label with LightScribe is easy. To start, you need to run LightScribe-supported labeling software. The label software often can be launched as a separate application that is included with your CD or DVD burning application programs. Depending on the labeling software you use, you can create a label before or after you burn the disc content. NOTE: To burn a label, you must flip the disc over and place it label-side down in the drive tray.

The following step-by-step instructions will help you create your first simple LightScribe label using various LightScribe-supported labeling software. Refer to the documentation of each application for details on all of the available features.

Using Sonic Express Labeler to create a LightScribe Label Windows Platform
1. Click Start->All Programs->Sonic RecordNow!->Express Labeler. NOTE: You can also open the Express Labeler from within RecordNow! by clicking Label Disc.
2. Make sure that Disc Label is selected in Step 1: Select Project.
3. Click Disc Titles and then enter text for the Title and Subtitle.
4. Click Tracks to enter track titles. Click New and enter text for the information you want to include, and then click OK. You may have to select a different label template to display track titles.
5. Select a label template by clicking Layout and choosing a layout.
6. If desired, select a background by clicking Background. Select one of the provided backgrounds or click More to load up your own images to be used as the background.
7. When you are satisfied with the appearance of your label design, insert the LightScribe disc (label-side down) into the disc drive tray and then click Print.
8. From the Disc Label menu, select LightScribe 12cm Disc.
9. Select a Contrast Level and then click OK to begin burning the label. The estimated time to complete the label is displayed, along with a progress bar. You can continue to work on your computer while LightScribe is burning the label.

Using Roxio Easy Media Creator to create a LightScribe Label Windows Platform
1. Launch the Roxio Easy Media Creator disc labeling application. Click Start->All Programs->Roxio Easy Media Creator->Tools->Label Creator.
2. A simple title layout is shown by default. Double click on the Title and Data fields in the disc layout to enter a simple title and subtitle information.
3. If you want a different layout that allows for labeling the full area of the disc, click Select Style in the Edit Layout menu at the left of the screen. In the Select Style window, choose a style category from the left pane and select the style you want from the preview area. Ensure that the style covers the full area of the disc. 4. To use your own background, click Edit Background in the Edit Layout menu at the left of the screen. Check Use the following image as the background image option, click Browse..., select the image you want to load, and click OK.
5. If you want to add pictures to the label, click Add Image from the Add Object menu at the left of the screen. Select the picture you want to load and click OK. Pictures can be resized and positioned on the label design.
6. When you are satisfied with the appearance of your label design, insert the LightScribe disc (label-side down) into the disc drive tray and then click File->Print... from the menu at the top of the screen.
7. Select a Print quality level. In the Printer settings area, ensure that the printer selected is a LightScribe capable drive. Click OK. The estimated time to complete the label is displayed, along with a progress bar. You can continue to work on your computer while LightScribe is burning the label.

Frequently Asked Questions NOTE: Refer to www.lightscribe.com/support for a complete list of Frequently Asked Questions and answers.

What do I need to create a LightScribe label?
To create a LightScribe label, you need:
• A LightScribe-enabled DVD drive in your computer or LightScribe-enabled DVD writer. LightScribe-enabled computers or writers typically have the LightScribe logo or the word "LightScribe" displayed on the drive tray or computer itself.
• LightScribe-supported disc-labeling software. This is often included with your LightScribe-enabled computer or DVD writer
• LightScribe System Software. This is similar to a driver and is usually included with your LightScribe hardware. The latest update can be obtained from www.lightscribe.com/support.
• Specially coated LightScribe CDs or DVDs (sold separately at major retail stores or online). LightScribe discs are identified by the LightScribe logo on the media package.

How can I tell if I have a LightScribe enabled DVD writer or PC?
LightScribe-enabled writers or PCs should either have a LightScribe name or LightScribe logo on the drive tray cover or a LightScribe sticker affixed elsewhere.

How do I create a LightScribe Label?
After the data side is burned using any data burning software, the disc needs to be flipped and reinserted into the drive tray with the label side down. The LightScribe label is created separately using labeling software.

Where Can I buy LightScribe CDs and DVDs? In the U.S., customers can find LightScribe CD and DVD+R media at major consumer electronics stores, office supply stores, and online. LightScribe DVD-R media is available from HP in select retail stores. Refer to www.lightscribe.com/buy for updated information on where to obtain LightScribe media.

Betsy
The PC Teacher
www.thepcteacher.com
bcoyne@thepcteacher.com

Tuesday, December 15, 2009

Outlook and Mail

If you are using a Windows PC, you may be using a program called "Outlook or Outlook Express" or curious to know what it is. If you are using a MAC, the equivalent programs to Outlook are called: Mail, iCal and Address Book.

Courtesy of http://office.microsoft.com/en-us/novice/FX10.aspx?ofcresset=1
Outlook is software that lets you not only send, receive, and manage e-mail, but also manage your calendar and contacts, such as friends and business associates.
Moreover, you can also share your calendar with family and colleagues via the Internet.

Outlook is a part of "Office", a suite of products combining several types of software for creating documents, spreadsheets, and presentations, and for managing e-mail.

Tip: Why is it called "Office"?
You might wonder why document creation and spreadsheet software that you use at home are a part of a suite of software called "Office". There is a historical reason for this. Previously, document creation and spreadsheet software were used primarily for work. The software was combined into a suite of software for work so it was called "Office". Since then, personal computers have become popular even in the home, but the software suite, which combines document creation and spreadsheet software, is still called "Office".

Tip: Referring to Outlook
Outlook is usually referred to as "Outlook" in the software screens and help. It is also referred to sometimes as "Microsoft Office", "Office Outlook" or "Microsoft Office Outlook 2007". They all represent Outlook.

Tip: Outlook can manage various information
Of course, Outlook can manage not only your e-mail, contacts, and calendar centrally, but can also manage all the information you exchange using your computer, such as news and blog articles distributed on the Internet and instant message service chat sessions. Additionally, if you add features, you can manage information exchanged using a cellular phone, IP-Phone, and a personal digital assistant (PDA or Smartphone) loaded with Windows Mobile.


Three built-in applications that work as one: Mail, iCal, and Address Book bring the power of Mac OS X to your email, calendar, and contacts. You get elegant, easy-to-use interfaces, lightning-fast searches, and complete integration across the applications and your Mac.

Mail: All your email accounts in one place.
Designed from the ground up specifically for email, Mail offers an elegant user interface that makes it easy to manage all your email from a single, ad-free inbox, even when you’re not connected to the Internet. It works with most email standards and most popular email services, such as Gmail, Yahoo! Mail, and AOL Mail. If you have more than one email account, no problem. Just add all your accounts to Mail and you’ll be able to access everything from one central place.

Betsy
The PC Teacher


Sunday, December 13, 2009

Amazon.com Sells Outerwear

I received an email this morning from Amazon.com that said: "Today Only! Outerwear is up to 75% Off!"

After that brief thought (I didn't know Amazon also sells coats!), I followed the link to find many coats for all members of the family from famous designers at up to 75% off and many items have free shipping!

So I'm forwarding this good news on to you! Here are my picks:

Saturday, December 12, 2009

Google Your Ingredients


While you are prepping for the holidays, don't forget to use your computer's internet connection to help you figure out what's for dinner. You can find some quick and easy recipes if you use certain keywords in your internet search. I like to keep the following items in my pantry or fridge to have on hand: chicken broth, bread crumbs, egg noodles, garlic, lemons, white wine, ketchup, mustard, Worcestershire, herbs and spices, etc. to make it easy to put together most of the recipes I find on the internet.

Using Google.com, conduct an internet search using some ingredients you have in your house.

Try this:

1. In the Google Search Box, type these 4 words: roast chicken lemon garlic

2. Click "I'm Feeling Lucky"

3. As of this writing, the Foodnetwork.com website comes up with a delicious recipe by Ina Garten ("Barefoot Contessa")
If you like the Foodnetwork.com, you can use a specific set of keywords in your Google to only get Foodnetwork recipes in your results. Try this:
1. In the Google Search Box, type these 4 words plus the "site" command:
chicken tomato mozzarella spinach site:www.foodnetwork.com
2. Don't type any spaces after the word 'site' or after the colon.
The results screen will display links only from www.foodnetwork.com

Let's assume you make the chicken tonight and you have leftovers.

The next day, type the following words into your Google Search Box:

1. Type these 4 words: cooked chicken broccoli noodle

2. Press Enter on your keyboard.

3. The results screen displays a variety of delicious recipes.


If you are going to be out of the house during the day, try searching Google for a crock pot recipe.
1. Type these 4 words: frozen chicken broth noodles

2. Yes! That says frozen chicken. You can put boneless chicken breasts right from the freezer (best if pounded thin before frozen) directly into the bottom of the crock pot.

3. I followed the recipe from Cooks.com: http://www.cooks.com/rec/view/0,1612,132190-252199,00.html

4. Once again using the egg noodles from my pantry. Almost all of these recipes call for bacon oddly enough so I'll be buying a package tomorrow.

On many of the cooking and recipe sites you are given the option to print the recipe. Take advantage of that! Keep all your recipes in a 3-ring binder by category (Appetizers, Soups, Snacks, Meat, Vegetarian, Dessert, etc.)

Happy Googling and Happy Cooking!

Betsy
The PC Teacher

Thursday, December 10, 2009

How to Setup a Mailing in Excel and Word


If you're looking to use your computer for tasks that you would normally do by hand, you must try creating an address book in Excel and using it to print address labels in Word.

To create an address book in Excel:

  1. From the Excel window, use the first row to type the names of the column headers (i.e. Last Name, First Name, Address 1, Address 2, City, State, Zip
  2. Adjust the column widths to accommodate long names and addresses.
  3. Type the names and addresses. Be careful here of any typos. The data will appear on the labels exactly as it is typed in Excel.
  4. Save the spreadsheet.
To create the labels in Word:
  1. From the Word window, click on the Mailings tab (Microsoft Word version 2007)
  2. Click Start Mail Merge and choose labels.
  3. Pick the Avery Labels format option associated with the size labels you are using.
  4. Click the Select Recipient button and choose Use Existing list
  5. Navigate to where you saved the spreadsheet created in step 4 above.
  6. Open the spreadsheet and the corresponding sheet.
  7. Click the Insert Merge Field button and pick the fields to layout the label.
  8. Click Update Labels button to make all the labels on the sheet look the same.
  9. Click the Finish Merge button and merge to a new document so that you can check the addresses and spacing.
  10. Click the Office Button and choose print to print the labels.
Your address book that is saved in Excel can also be used to print directly to envelopes or for printing form letters.


Short on time? The PC Teacher does your mailings for you. For only $45 your names are entered into Excel (up to 100 names) and you get the labels to go with it. (50 cents per additional name) You will get your address book on CD to be used with future mailings. Call or email today to set up an appointment.

Betsy Sabatini Coyne
The PC Teacher
bcoyne@thepcteacher.com

Tuesday, December 8, 2009

Take a Byte Out of Storage


When I started working in technology and information systems 22 years ago, my job entailed helping people copy their computer files to an external disk in order for their data to be safe (in case their hard drive ever crashed). In those days (the late 80's), we copied our files to a floppy disk. The disk was capable of holding 1, 440, 000 bytes or what you see abbreviated as: 1.44 MB

Now flash forward to 2009. I'm shopping for holiday gifts and one item on my list is an external hard drive. Staples has a Seagate desktop external drive capable of holding 1,500,000,000,000 bytes or abbreviated as: 1.5 TB

So I thought I'd dedicate today's blog to data storage and how many bytes you get per disk. First let's discuss the abbreviations for disk capacity:

1 megabye (MB) = 1 million bytes
1 gigabyte (GB) = 1 billion bytes
1 terabyte (TB) = 1 trillion bytes

When shopping for computers, either desktop, laptop or netbook, there usually is a hard drive built in. This storage capacity ranges from 900 MB (older computers) to 2 TB (newer computers).

If you are using a Windows PC, you can go to "My computer" on your desktop then right click and go to properties and then a screen will pop up and it will tell you how many bytes your hard drive has.

If you are using a MAC, you can go to your "Finder" then control-click on the hard drive icon and choose Get Info from the pop-up and it will tell you how many bytes your hard drive has.

An easy way to backup or make a copy of your photos, documents, presentations, fliers, brochures, etc., is with a USB drive (also known as flash drive, jump drive, thumb drive). A typical USB drive holds data in multiples of 1 GB. You can purchase a 4 GB drive on sale for approximately $15. An 8 GB drive is approximately $20. Look for manufacturer rebates and sales. You can find them in Staples, Radio Shack, Best Buy, Walmart, or online at amazon.com.


If you are storing photos taken with your digital camera, most likely they are stored on a memory card. A typical memory card holds either 1 GB, 2 GB, 4 GB, 8 GB, 16 GB or 32 GB. Read the instructions that come with your digital camera or camcorder because not all memory cards fit in all camera devices.


A typical CD-R (the type of disk you purchase to 'burn' a music CD for the home or car stereo) holds 700 MB. Depending on how the songs are recorded, this disk can hold approximately 100 minutes worth of songs.


A typical DVD-R (the type of disk you purchase to 'burn' a video or home movie DVD for the home DVD player) holds 4.7 GB. Depending on how the videos are recorded, this disk can hold approximately 2 hours of very good quality DVD-Video.


To learn how to backup your data to any of these disks, call The PC Teacher at 201-327-0830 or email me at bcoyne@thepcteacher.com . Gift certificates available in multiples of $30. Give the gift of joyful learning this holiday season.

www.thepcteacher.com

Thursday, December 3, 2009

Meet a Friend in a Place Between

Meeting a Friend for the Holidays?

If you are meeting up with friends this holiday season and need help finding the best half-way point between your homes, log on to


From their homepage, look in the upper right corner.
Click in the box that says "Where are you coming from?"
Type the city and state of where you live
Click Add
Type the city and state of where your friend lives
Click Add
Click in the box that says "Where would you like to meet?"
Type a keyword such as Starbucks, Dunkin Donuts, Movies, Pizzeria, etc.
Click "What's Between" to see a list of places with addresses and phone numbers.

Have fun,

"Helping You Click with Technology"


Tuesday, December 1, 2009

Free Holiday Music Downloads


Today Only on Oprah.com

Free Holiday Music Downloads - If you're a fan of christmas music and enjoy listening to Mary J Blige, Andrea Bocelli, Jennifer Hudson and Sugarland, log on to www.oprah.com today.

From November 30 at 10 a.m. CT to December 1 at 11 p.m. CT, download Andrea Bocelli's and Mary J. Blige's duet on "What Child Is This" and Sugarland's "Silent Night" for free!

Download Directions:
If you're on a PC, right-click (Mac users: Ctrl-click) on a song link. Internet Explorer users, select Save Target As; Firefox users select Save Link As.

Select where you wish to save the file on your computer, and then click Save.
Once the file has been saved, go to the location where you saved the file and open the file to begin listening.

If you use iTunes, click File then click Add to Library and navigate to where you downloaded the songs. Connect your iPod to your computer and enjoy holiday music on-the-go!

Enjoy!
Betsy Sabatini Coyne
The PC Teacher