Windows Live Movie Maker is a free program that comes with the Windows Live Essentials suite of programs available from Microsoft. Visit this link for more information: http://explore.live.com/windows-live-movie-maker?os=mac With Windows Live Movie Maker, you can turn your photos and videos into ovies. Add special effects, transitions, sound, and text to help tell your story. Sharing with friends and family is easy—whether on the web, or DVD. DVD burning in Movie Maker is dependent on Windows DVD Maker, which is only available in Windows 7 and Vista.
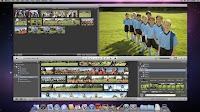
 Chances are, you have a camcorder, a digital camera, or an iPhone — and maybe all three. That means one thing: You have a ton of great video. iMovie puts it all in one place and organizes it for you so your video is easy to browse and fun to watch. Just plug in your device, open iMovie, and start importing your video. It appears in your Event Library — the one place you’ll find everything you’ve ever recorded. When you're ready, share your movie with iDVD (already installed on your Mac) and give to family and friends.
To make a movie with Windows Live Movie Maker, you'll need some photos and videos on your computer. You can import photos and videos from your digital camera, a flash memory card, DVDs, or your mobile phone.
Step 1: Connect a camera to your computer
Connect the camera to your computer by using a USB cable, and then turn on the camera.
Step 2: Start importing in Movie Maker
Click the Movie Maker button, and then click Import from device.
If the Photos and videos will be imported into Windows Live Photo Gallery message appears, click OK.
Step 3: Choose the device
Click the device you want to import photos and videos from, and then click Import.
Step 4: Import any new photos and video
On the New photos and videos were found page, click Import all new items now, type a name for all the photos and videos, and then click Import.
Step 5: Select the photos and videos to use in your movie
In Windows Live Photo Gallery, select the check box in the upper-left corner for each photo or video you want to use in your movie. On the Create tab, in the Share group, click Movie.
When the photos and videos appear in Movie Maker, you’re ready to start making your movie.
iMovie:
After you create a project, you add video clips to it that you’ve already imported (transferred) from your camera to your computer.
All of your imported video appears in the Event Library. From there, you select specific video and add it to your project by dragging it to the project in the Project browser, which is your project workspace. As you add video and other elements to your project, they appear immediately in the Project browser, where you can edit them, rearrange them, delete them, and so on.
Add video to a project
- Open an existing project by double-clicking it (don’t click the project’s name directly) in the Project Library.
If you don’t see the Project Library, click the Project Library button.
- In the Event Library, select an Event whose footage you want to add to your project.
If you don’t see the Event Library, click the Event Library button, which is typically located in the lower-left corner of the iMovie window.
You select an Event by clicking its name once. The Event footage appears in the Event browser to the right of the Event Library.
- In the Event browser, select a range of video frames or an entire video clip.
To select an entire video clip, hold down the Shift key and click the clip once, so that it’s outlined in yellow.
To select a portion of a clip (called a frame range), drag across any clip while you hold down the button on your mouse or trackpad. Selected frames are outlined in yellow. - Drag your video selection to the Project browser.
You drag by holding down the button on your mouse or trackpad as you move the selected clip to the Project browser. You can drag it anywhere: to the beginning or end of the project, or between clips you’ve already added. A vertical green line, along with a green Add (+) symbol, appears anywhere you can place the clip.
The image below shows how the Project browser appears when you add your first video clip to a project.
Video that’s been added to a project is marked along the bottom with an orange stripe in the Event browser, so that you can see at a glance which video you’ve used. You can add the same video to multiple projects, and you can use it more than once within a project.
Follow the PC Teacher at www.thepcteacher.com for more information and help. Have fun making your own home movies!


